Web Filtering: squid and squidGuard
There are several commercial products available for URL or content filtering but you can actually set up a very robust system on your own using SquidGuard and DefenseBolt. SquidGuard is a very useful plugin for the popular Squid proxy server that can be used for blocking or redirecting web requests on your network.
SquidGuard has a long list of features that can be customized to meet your needs. It is also extremely fast and won’t slow down internet access for your users. If you need to block access to a list of undesirable websites or only allow access to certain sites then SquidGuard can assist you with this.
SquidGuard is very flexible making it easy to adapt to different applications. Whether you need to do basic URL filtering on your home network or you need to create complex rules for a large public network SquidGuard can do the job.
Before you can set up SquidGuard you will need a functioning DefenseBolt proxy server. If you’re new to DefenseBolt I would recommend reading through the introductionto DefenBolt guide first.
- DefenseBolt - Package Manager
- DefenseBolt-Proxy filter: Times
- DefenseBolt - Proxy server
- DefenseBolt-Proxy filter:Target categories
- DefenseBolt - Proxy filter: getting it going
- DefenseBolt-Proxy filter: Group ACL
- DefenesBolt - Proxy filter: blacklists
- DefenseBolt-Proxy filter: Target Rules
DefenseBolt - Package Manager
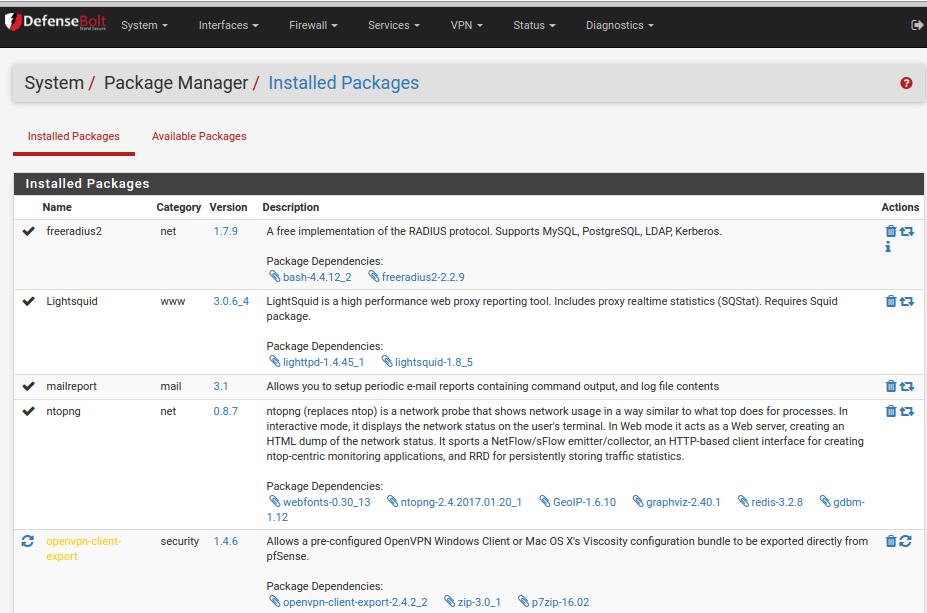
One of the neat things about DefeneseBolt is its ability to integrate with other common packages. There are a huge number of different packages - look under System, Packages then the Available Packages tab. You should locate these packages and install them one at a time by using the + button beside each package: squid - this is a caching proxy package - referred to as Proxy server on the Services menu once installed. squidGuard - this does the actual filtering - referred to as “Proxy filter” on the “Services” menu once installed. Sarg - this lets you see what your users have been doing, including monitoring in real time - referred to as Sarg Reports on the Status menu once installed You need to install these one at a time. Once installed the packages will show on the Installed Packages tab
There are other web filtering packages available that work with DefenseBolt - eg DansGuardian is also very good. We chose squidGuard because we were already familiar with it.
We installed several packages
DefenseBolt - Proxy server
From the Services menu choose Proxy server. Configuring the actual proxy server is a very easy process and the biggest decision you need to make is whether or not to run the proxy transparently. we choose to run a non-transparent proxy so that we could have different rules for different groups. A non-transparent proxy means that our users need to supply authentication credentials to the proxy. We can link the proxy server to our local Microsoft Active Directory and use that as the user database.
Remember that defining a non-transparent authenticating proxy means that all devices that connect to the internet must be able to define the proxy IP, port, username and password.
The process is simple and here are our configuration screens:
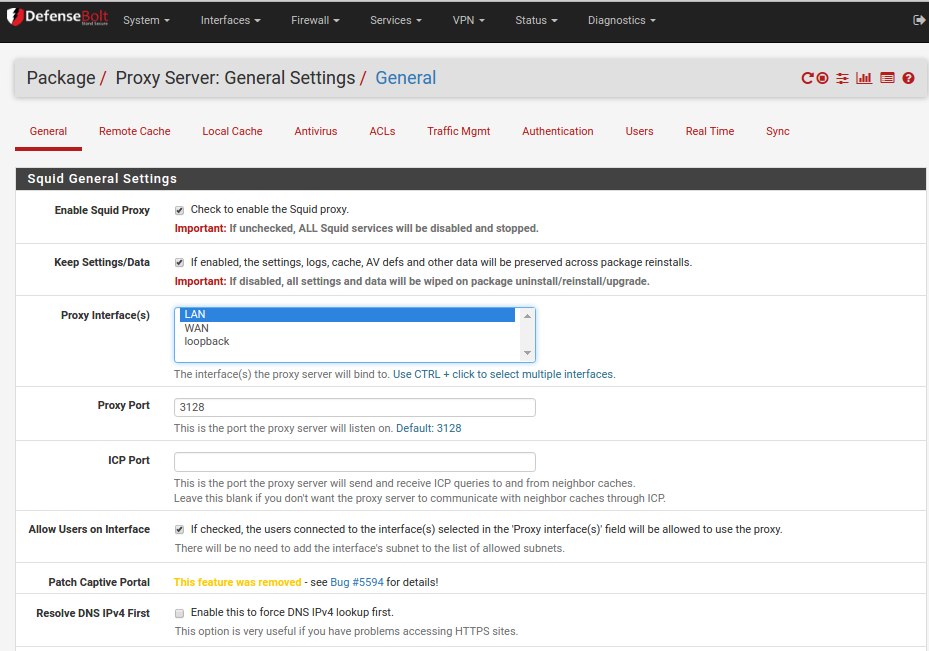
- Enable squid Proxy - tick it.
- Keep setting/Data - tick it.
- Proxy interface - LAN (not much point in it being anything else really!)
- Allow users on interface - tick it. Simple.
- Proxy port - 3128 is the default port but you can change it if you want. If you do change it you need to make sure no other service on DefenseBolt is using that port so to be safe stay with the default
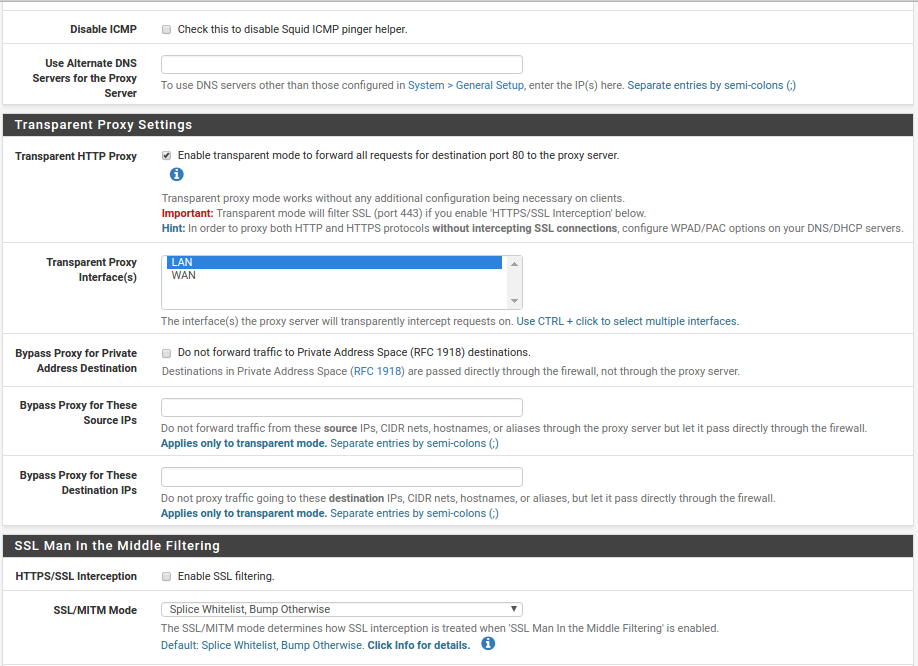
- Transparent HTTP Proxy - tick it.
- Transperant Proxy Interface - LAN.
- Visible host name - this is displayed in any messages to users
- Administrator email - you can use any valid email address here but a sensible alias is a good idea.
- Custom options - when you enable squidGuard this will be automatically added for you but if for some reason it is not then you can add them in.
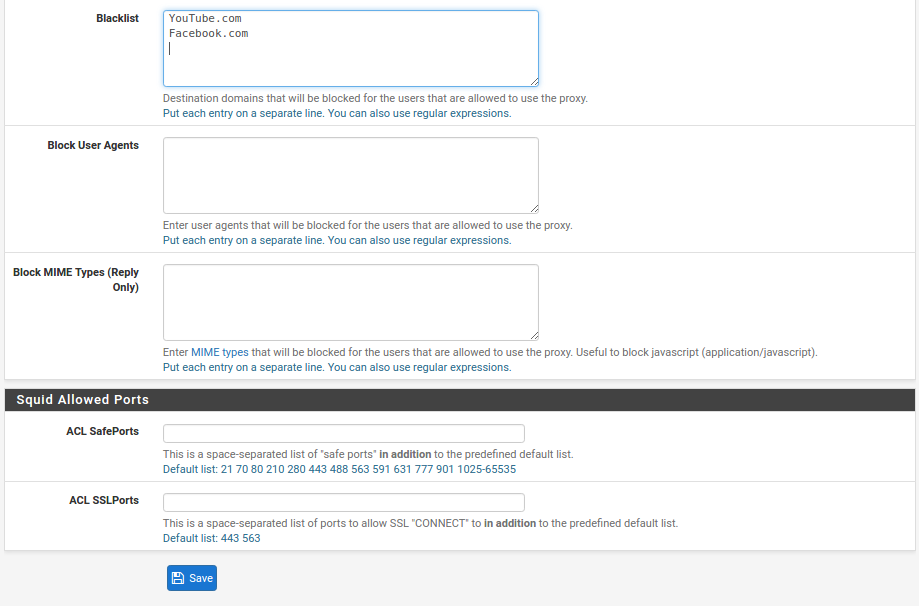
In the above section the most obvious thing you can do is define whitelisted and blacklisted sites.
DefenseBolt - Proxy filter: getting it going
From the Services menu choose Proxy filter. Complete the fields on the General settings tab as shown below.

Critical things:
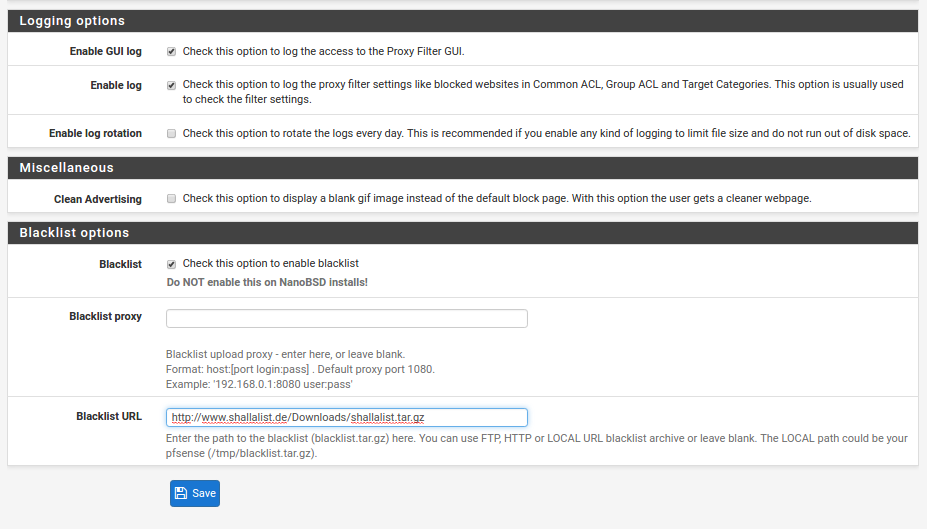
- Enable - Tick the box
- Blacklist - Tick the box
- Blacklist URL - use http://www.shallalist.de/Downloads/shallalist.tar.gz (There will be more about the use of blaclist soon.)
This is critical too:
- Click Save at the bottom.
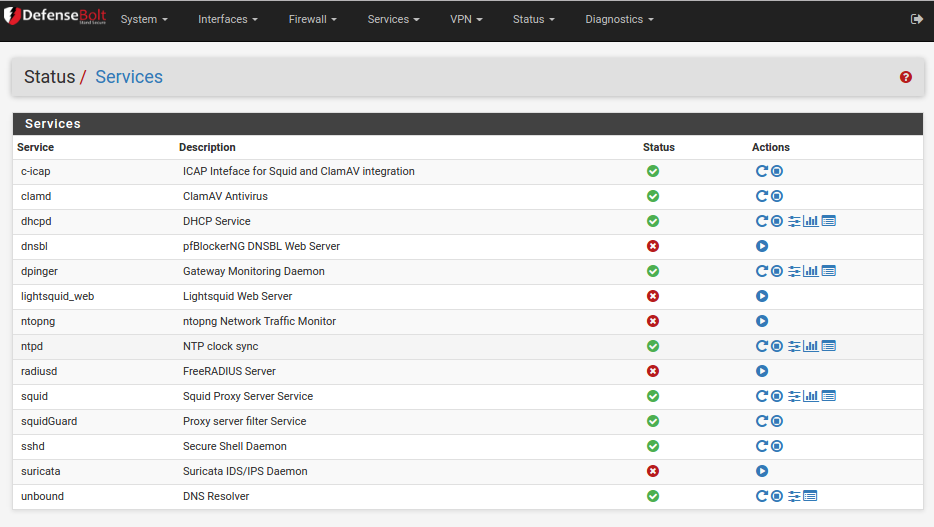
- Restart DefenseBolt - use Diagnostics then Reboot. Once the reboot is completed log back in and return to the Services Proxy filter page.
At this stage the SquidGuard service state: message should say green tick mark. If it does not use the Status menu, then Services and restart the squidGuard service.
This is critical too:
- From now on if you make any configuration changes to squidGuard on any tab then you must return to the General settings and click Apply (at the TOP of the screen - not the save button at the bottom) so that those changes are loaded into the system.
- No squidGuard filtering changes will take effect until the Apply button is pressed and the filter rules reloaded. This might take 10-30 seconds to happen.
- Check the Squid proxy server page Services, Proxy server, General tab. Look at the Custom Options section at the bottom of the page. If the following text is not there, copy it from here and then click Save. It may also be a good idea to restart DefenseBolt again too.
redirect_program /usr/local/bin/squidGuard -c /usr/local/etc/squidGuard/squidGuard.conf;redirector_bypass off;url_rewrite_children 5
DefenseBolt - Proxy filter: blacklists
Navigate to Services, Proxy Filter and then the Blacklist tab. The Blacklist Update URL should be in place from earlier:
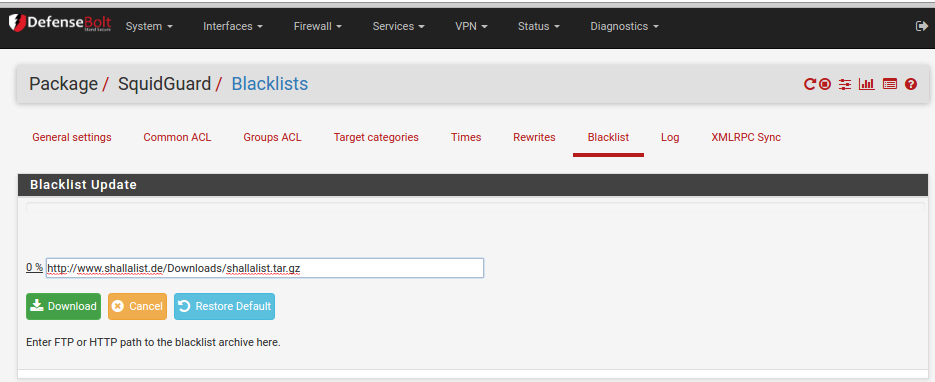
Click the Download button and wait while the latest blacklists are downloaded and installed. Once completed the following is displayed:
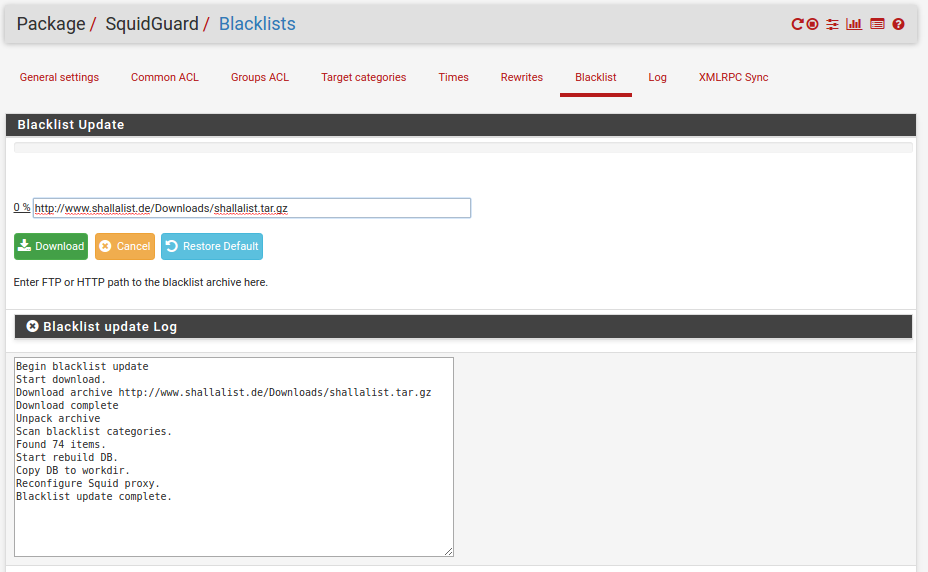
You can visit the Shallalist site to see what the categories are, how a site is categorised or submit a URL for review. Educational institutions can use the blacklists for free and you can update as frequently as you need to. You should register your company by sending them an email. Include your static public IP address Ethernet IP - Customer (this is 122.56.103.95.) Shalla Secure Services will send you a contract. Sign it, scan it and email it back. Details are on their Licence page. They are very easy to work with.
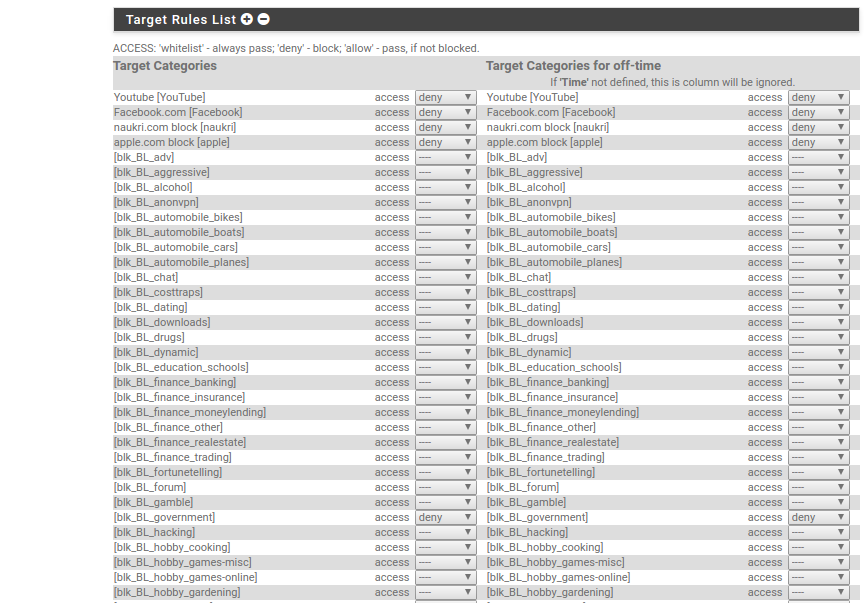
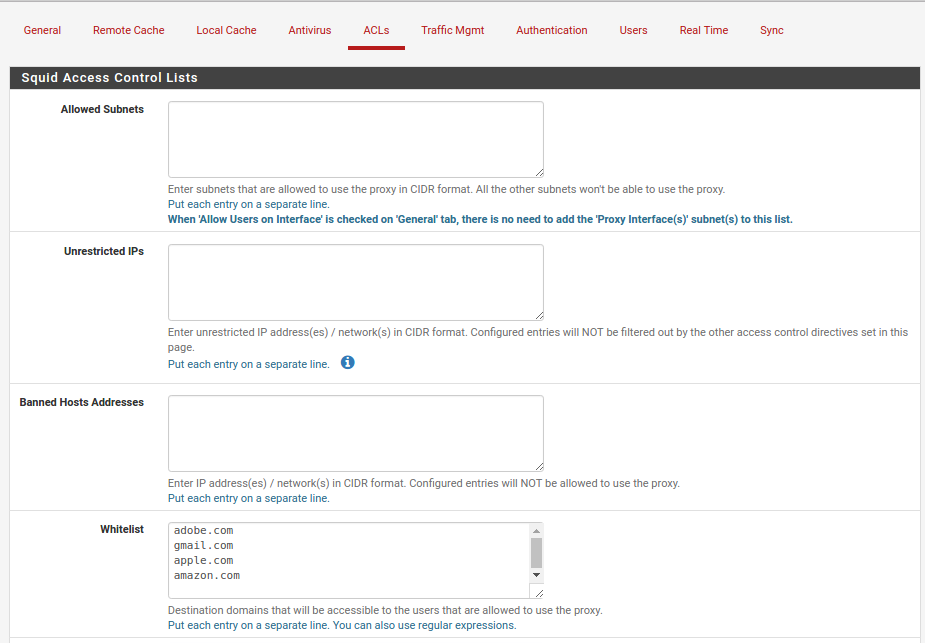
The actual blacklist categories are used on the ACL (Access Control List) tabs - either the Common ACL tab if you are running a transparent proxy or the Groups ACL tab if you are using a non-transparent proxy or if you are using a transparent proxy with advanced features like timed access - see below. Mt Aspiring College uses the Groups ACL tab as we run a non-transparent proxy. More on that later.
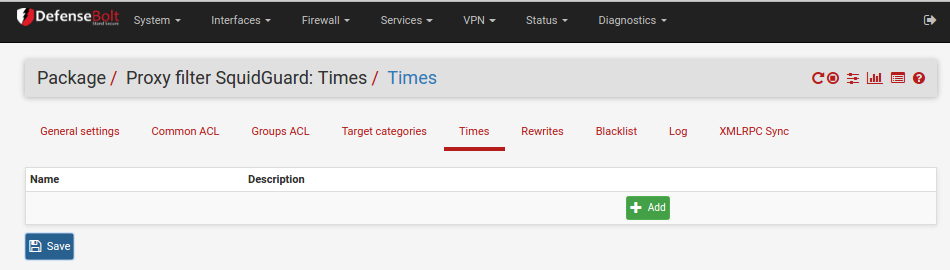
DefenseBolt - Proxy filter: Times
Creating time-based rules with squidGuard is easy. All you need to do is create the time rule and then use it with the required ACL - either the Common ACL or any of the items listed on Groups ACL.
We wanted to use time based rules to permit access to sites like Facebook, Trademe or YouTube to some employee.
Before using time based rules it is important to make sure that you have correctly configured your time zone and NTP server details from the System, General menu.
put image time
Click the add at the bottom to add a new time definition. You can have multiple time rules but an ACL can only use one rule at a time (!)
Our rule detail looks like:
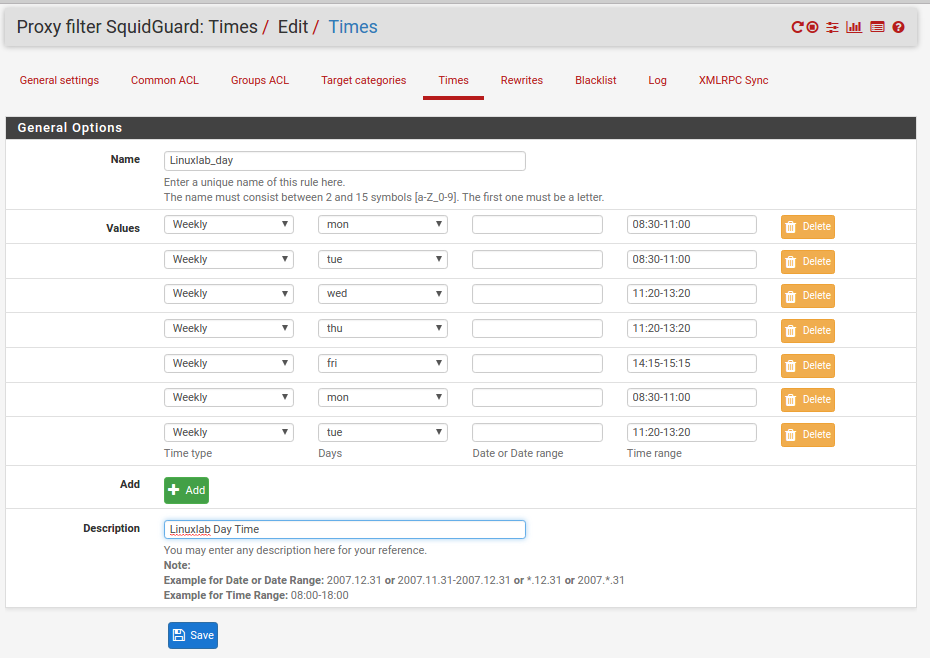
As much detail as you want can be applied to the rule - eg you could cope with Monday holidays by using multiple date ranges but we thought our employee should have a real life too!
Click the add at the bottom to add a new time.
Remember that once you save the rule (or any rule in squidGuard) to return to the General settings tab and Apply the changes. You can make multiple changes and then apply them all at once if you wish.
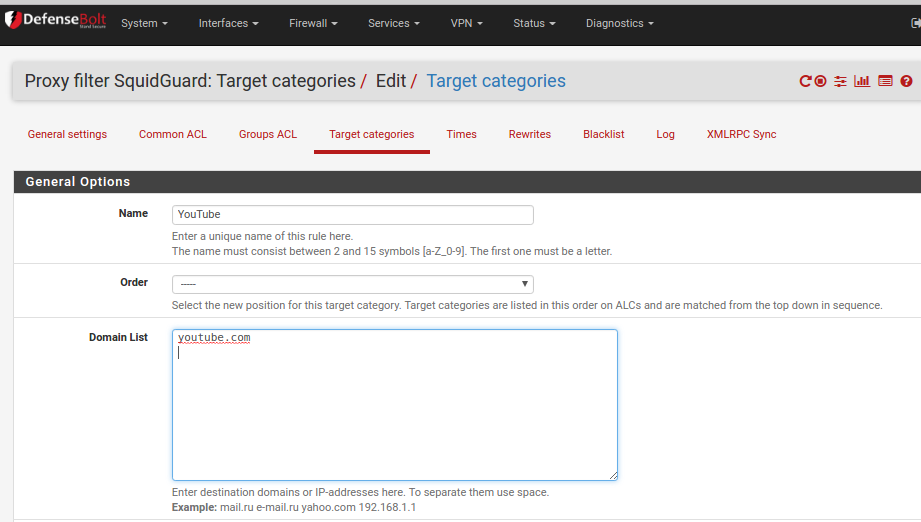
DefenseBolt - Proxy filter: Target categories
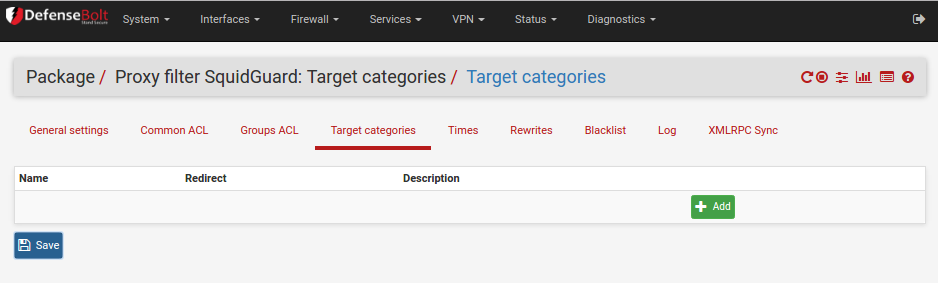
The Shalla blacklists are really a range of sites classified into 74 different groups. Target categories let you create your own groups of websites and you can then selectively allow access (or not!) to these sites for any groups in the Groups ACL.
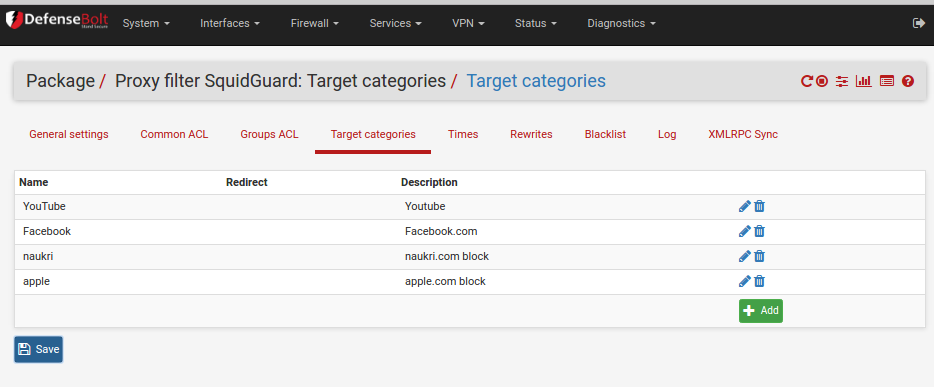
Click the add at the bottom to add a new group. An example showing the YouTube category is below:
Critical things:
- Order - you can select where abouts in the list this category should sit. They are matched from top - bottom in order.
- Domain List - enter the domain(s) that you want to be in this category
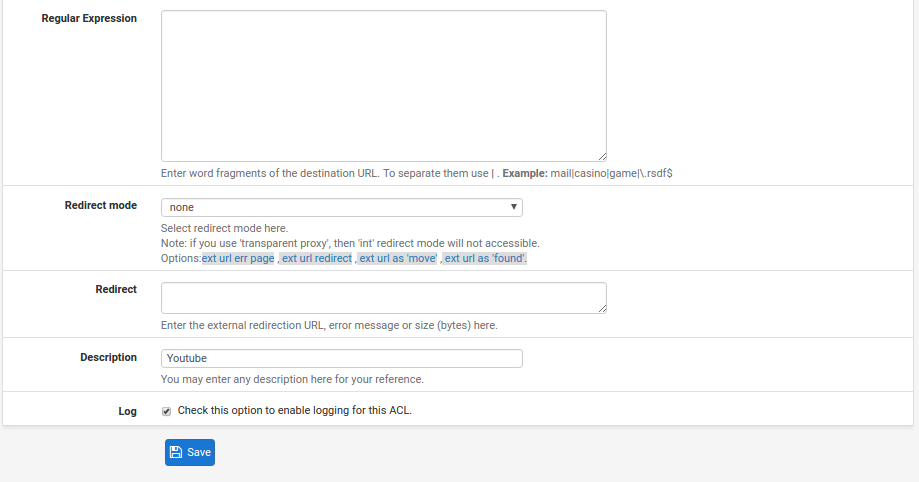
- URL List - this is useful to allow or disallow access to a part of a website
- Regular Expression - think of this as a series of wildcards for looking for any text in the URL.
You can have more than one site listed. It is over to you how you want to organise things.
Remember that once you save the rule (or any rule in squidGuard) to return to the General settings tab and Apply the changes. You can make multiple changes and then apply them all at once if you wish.
DefenseBolt- Proxy filter: Groups ACL
The final part of the puzzle to use squidGuard is the creation of groups on the Groups ACL tab. If you want to use Squid as a transparent proxy and use and advanced feature like eg time-based filtering you will also need to use groups - except that you will have just one group and it will be the default group that every one is in. It will be equivalent to the Default_List .
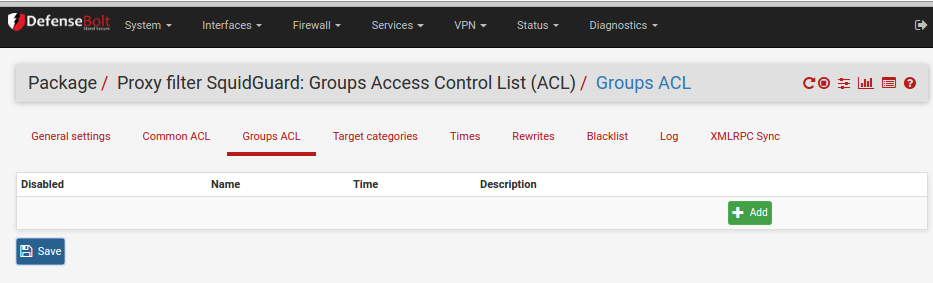
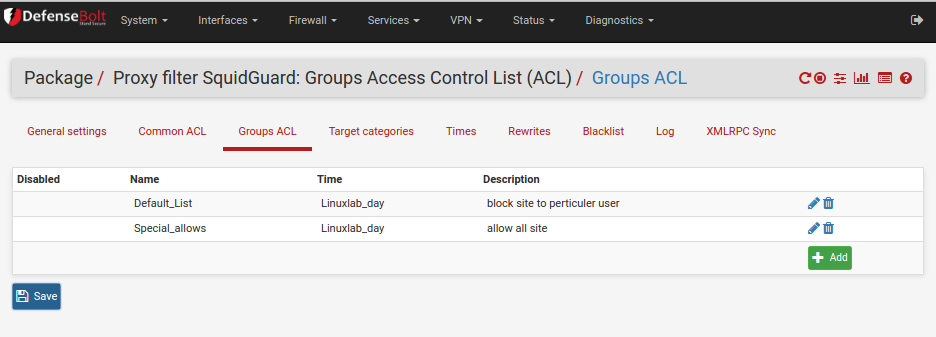
Click the add at the bottom to add a new group ACL.
Taking the Default_List first as it is the more complex of the ACLs. Also notice that it is the last ACL on the list so that if matches on the other ACLs fail then users will fall into this ACL.
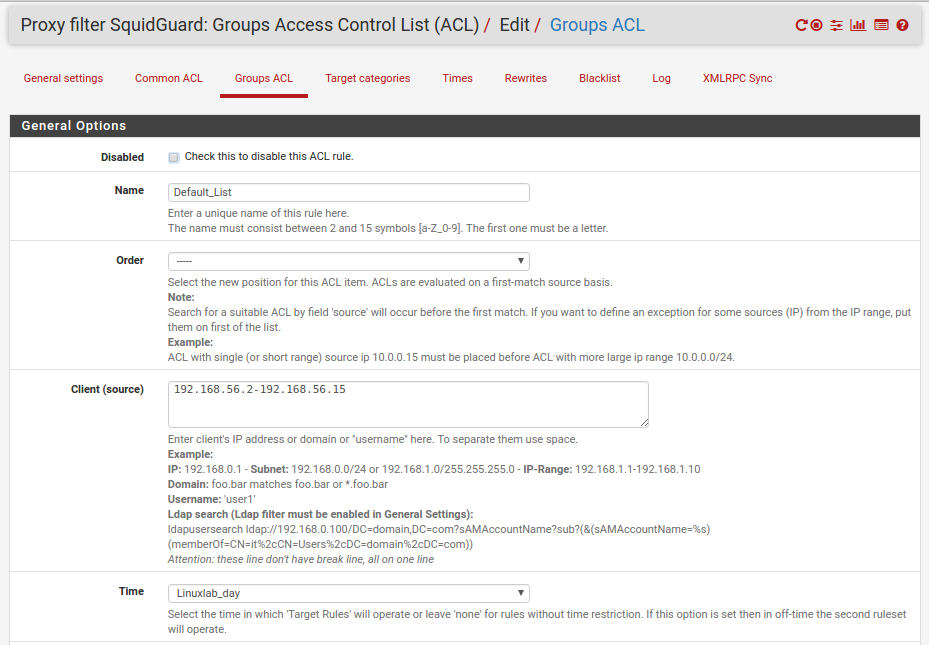
Critical things:
- Order - make sure you position this ACL last. It may be that when you make other ACLs that you position them before this ACL.
- Client (source) - by entering the local subnet range there is something to match against. If you are running a transparent proxy and you want to use eg time based rules then this is how you do it as the Common ACL tab does not have a Time setting.
- Time - if you want to use a time-based rule select the rule name that you have already created.
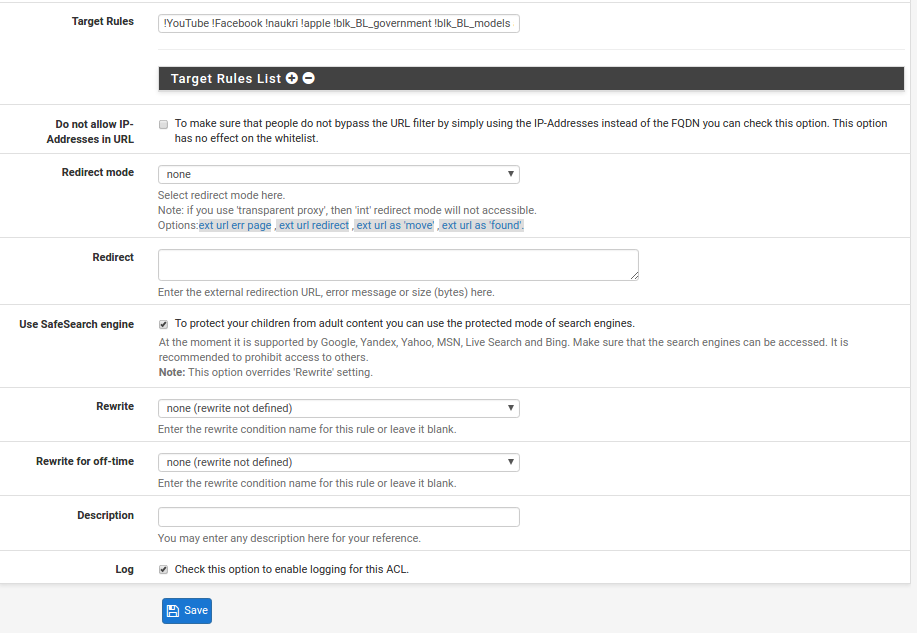
- Target Rules - Click the white triangle in the green square to open up the category and blacklist definitions. This is where you use the actual time rule. More on this below as it is almost a separate topic.
- Do not allow IP-Addresses in URL - we decided to allow this despite the risks associated as it allows eg Skype to be used by our employees.
- Use SafeSearch engine - click this to force safe searches on a variety of search engines
Other ACLs work in a similar way except that the Client (source) entry has a different definition to it. Then you can also apply different Target Rules to members of the group.
ndividual usernames are entered into the “Client (source)” box. Each entry must be single quote enclosed and space-separated. You can base this on your AD groups using LDAP too if you want to - this automates the group members for you and can lead to very powerful and complex solutions.
Remember that once you save the rule (or any rule in squidGuard) to return to the General settings tab and Apply the changes. You can make multiple changes and then apply them all at once if you wish.
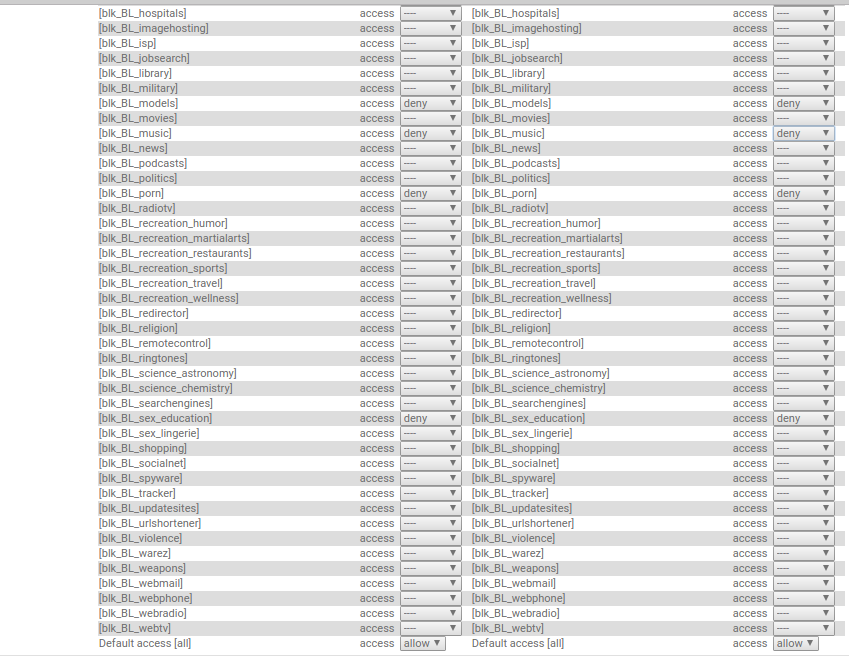
DefenseBolt - Proxy filter: Target Rules
Target Rules uses a combination of blacklists, target categories and time rules in such a way that you can limit access quite precisely for members of the relevant ACL.