User Management
The User Manager is located at System > User Manager. From there users, groups, servers may be managed, and settings that govern the behavior of the User Manager may be changed.
1) Users
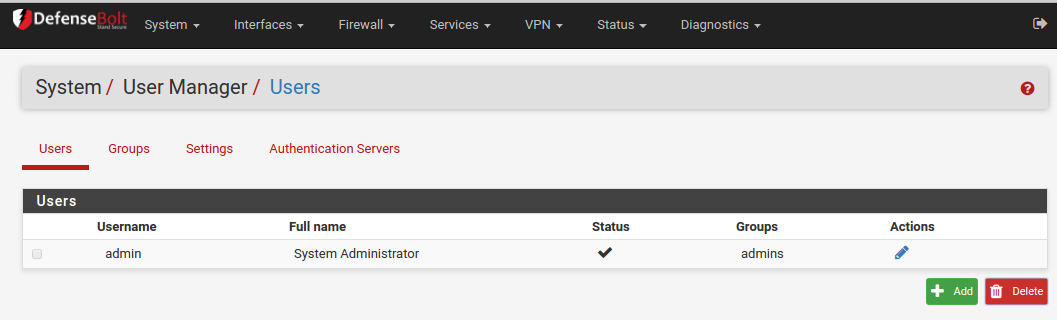
The Users tab under System > User Manager is where individual users are managed. To add a new user, click Add, to edit an existing user, click edit .
Before permissions may be added to a user, it must first be created, so the first step is always to add the user and save. If multiple users need the same permissions, it is easier to add a group and then add users to the group. To add a user, click Add and the new user screen will appear.

Disabled This checkbox controls whether this user will be active. If this account should be deactivated, check this box.
Username Sets the login name for the user. This field is required, must be 16 characters or less and may only contain letters, numbers, and a period, hyphen, or underscore.
Password and Confirmation are also required. Passwords are stored in the DefenseBolt configuration as hashes. Ensure the two fields match to confirm the password.
Full Name Optional field which can be used to enter a longer name or a description for a user account.
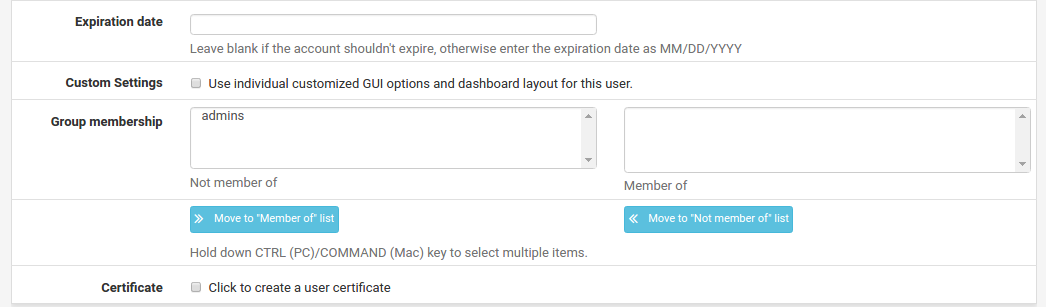
Expiration Date May also be defined if desired to deactivate the user automatically when that date has been reached. The date must be entered in MM/DD/YYYY format.
Group Memberships If groups have already been defined, this control may be used to add the user as a member. To add a group for this user, find it in the Not Member Of column, select it, and click >> to move it to the Member Of column. To remove a user from the group, select it from the Member Of column and click << to move it to the Not Member Of column.

Effective Privileges Appears when editing an existing user, not when adding a user. See Privileges for information on managing privileges. If the user is part of a group, the group’s permissions are shown in this list but those permissions cannot be edited, however additional permissions may be added.
Certificate Behavior of this section changes depending on whether a user is being added or edited. When adding a user, to create a certificate check Click to create a user certificate to show the form to create a certificate. Fill in the Descriptive name, choose a Certificate Authority, select a Key Length, and enter a Lifetime. For more information on these parameters, see Create an Internal Certificate. If editing a user, this section of the page instead becomes a list of user certificates. From here, click Add to add a certificate to the user. The settings on that page are identical to Create an Internal Certificate except even more of the data is pre- filled with the username. If the certificate already exists, select Choose an Existing Certificate and then pick an Existing Certificate from the list.

Authorized keys SSH public keys may be entered for shell or other SSH access. To add a key, paste or enter in the key data.
IPsec Pre-Shared Key Used for a non-xauth Pre-Shared Key mobile IPsec setup. If an IPsec Pre- Shared Key is entered here, the username is used as the identifier. The PSK is also displayed under VPN > IPsec on the Pre- Shared Keys tab. If mobile IPsec will only be used with xauth, this field may be left blank.
2) Groups
Groups are a great way to manage sets of permissions to give users so that they do not need to be maintained individually on every user account. For example, a group could be used for IPsec xauth users, or a group that can access the firewall’s dashboard, a group of firewall administrators, or many other possible scenarios using any combination of privileges.
As with users, a group must first be created before privileges can be added. After saving the group, edit the group toadd privileges.
Groups are managed under System > User Manager on the Groups tab. To add a new group from this screen, click Add button. To edit an existing group, click next to its entry in the list. .. note:: When working with LDAP and RADIUS, local groups must exist to match the groups the users are members of on the server. For example, if an LDAP group named “firewall_admins” exists then pfSense must also contain a group named identically, “firewall_admins”, with the desired privileges. Remote groups with long names or names containing spaces or other special characters must be configured for a Remote Scope.
Start the process of adding a group by clicking Add and the screen to add a new group will appear.
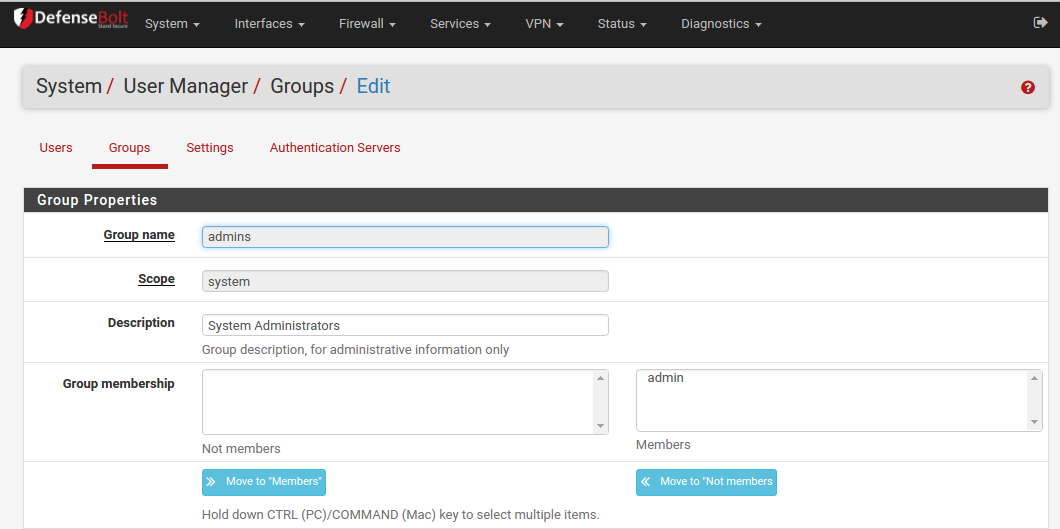
Group name This setting has the same restrictions as a username: It must be 16 characters or less and may only contain letters, numbers, and a period, hyphen, or underscore. This can feel somewhat limited when working with groups from LDAP, for example, but usually it’s easier to create or rename an appropriately-named group on the authentication server instead of attempting to make the firewall group match.
Scope Can be set Local for groups on the firewall itself (such as those for use in the shell), or Remote to relax the group name restrictions and to prevent the group name from being exposed to the base operating system. For example, Remote scope group names may be longer, and may contain spaces. Description Optional free-form text for reference and to better identify the purpose of the group in case the Group name is not sufficient.
Group Memberships This set of controls defies which existing users will be members of the new group. Firewall users are listed in the Not Members column by default.To add a user to this group, find it in the Not Members column, select it, and click >> to move it to the Members column. To remove a user from the group, select it from the Members column and click << to move it to the Not Member column.
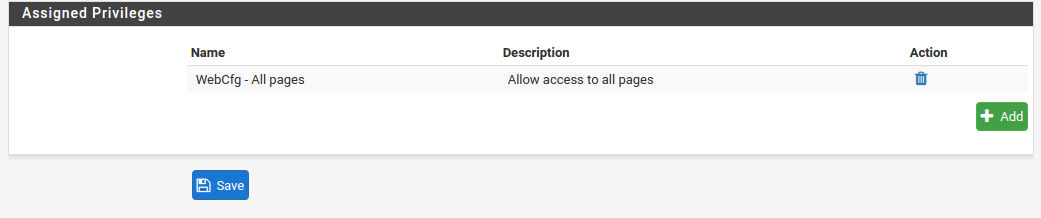
Assigned Privileges Appears only when editing an existing group. This section allows adding privileges to the group. See Privileges earlier in this for informationon managing privileges.
3) Settings
The Settings tab in the User Manager controls two things: How long a login session is valid, and where the GUI logins will prefer to be authenticated.
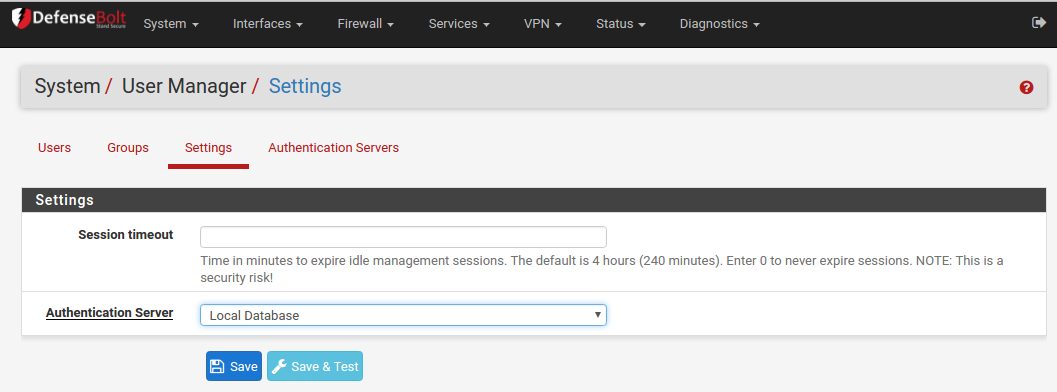
Session Timeout This field specifies how long a GUI login session will last when idle. This value is specified in minutes, and the default is four hours (240 minutes). A value of 0 may be entered to disable session expiration, making the login sessions valid forever. A shorter timeout is better, though make it long enough that anactive administrator would not be logged out unintentionally while making changes.
Warning
Allowing a session to stay valid when idle for long periods of time is insecure. If an administratorleaves a terminal unattended with a browser window open and logged in, someone or something else could take advantage of the open session.
Authentication Server This selector chooses the primary authentication source for users logging into the GUI. This can be a RADIUS or LDAP server, or the default Local Database . If the RADIUS or LDAP server is unreachable for some reason, the authentication will fall back to Local Database even if another method is chosen.
When using a RADIUS or LDAP server, the users and/or group memberships must still be defined in the firewall in order to properly allocate permissions, as there is not yet a method to obtain permissions dynamically from an authentication server. For group membership to work properly, pfSense must be able to recognize the groups as presented by the authentication server. This requires two things:
- The local groups must exist with identical names.
- DefenseBolt must be able to locate or receive a list of groups from the authentication server.
See Authentication Servers for details specific to each type of authentication server.
4) Authentication Servers
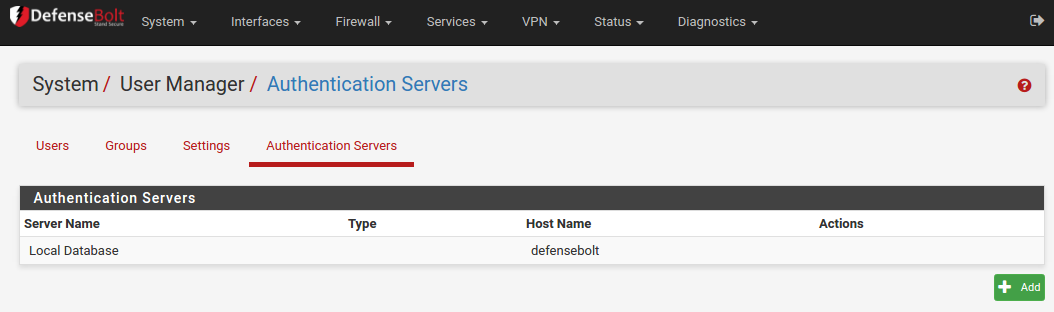
Using the Authentication Servers tab under System > User Manager, RADIUS and LDAP servers may be defined as authentication sources. To add a new server from this screen, click Add butten its entry.
See also:
Customers with a DefenseBolt Gold Subscription may access the Hangouts Archive to view the August 2015 Hangout on RADIUS and LDAP.
1.1) RADIUS
To add a new RADIUS server:
- Make sure that the RADIUS server has the firewall defined as a client before proceeding.
- Navigate to System > User Manager, Authentication Servers tab.
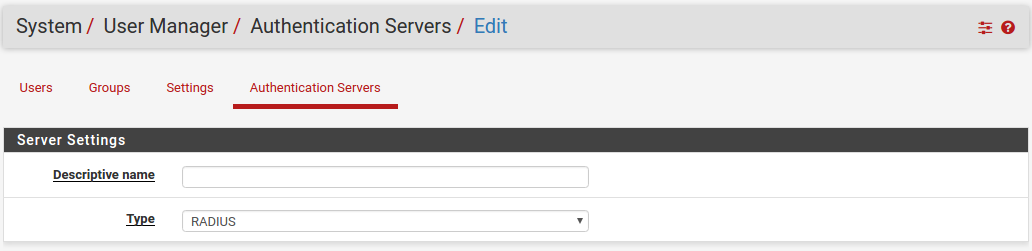
- Set the Type selector to RADIUS. The RADIUS Server Settings will be displayed.
- Fill in the fields as described below:
Descriptive name The name for this RADIUS server. This name will be used to identify the server throughout the DefenseBolt GUI.
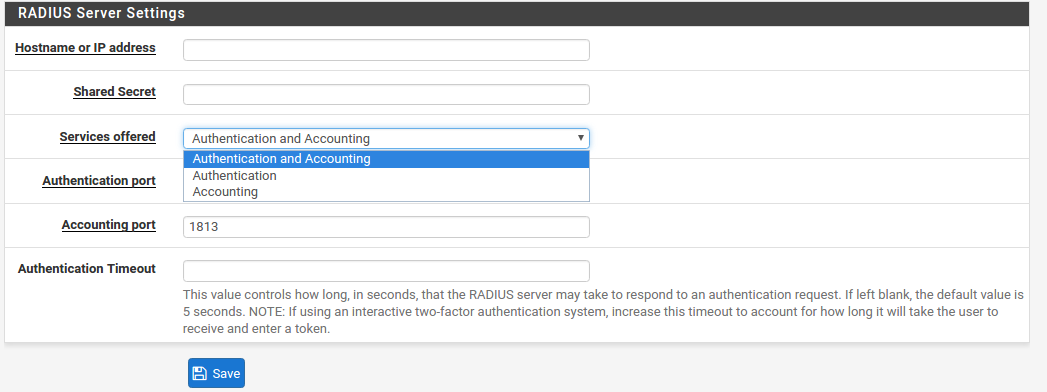
Hostname or IP address The address of the RADIUS server. This can be a fully qualified domain name, or an IPv4 IP address
Shared Secret The password established for this firewall on the RADIUS server software.
Services offered This selector set which services are offered by this RADIUS server. Authentication and Accounting , Authentication only, or Accounting only. Authentication will use this RADIUS server to authenticate users. Accounting will send RADIUS start/stop accounting packet data for login sessions if supported in the area where it is used.
Authentication port Only appears if an Authentication mode is chosen. Sets the UDP port where RADIUS authentication will occur. The default RADIUS authentication port is 1812.
Accounting port Only appears if an Accounting mode is chosen. Sets the UDP port where RADIUS accounting will occur. The default RADIUS accounting port is 1813.
Authentication Timeout Controls how long, in seconds, that the RADIUS server may take to respond to an authentication request. If left blank, the default value is 5 seconds. If an interactive two-factor authentication system is in use, increase this timeout to account for how long it will take the user to receive and enter a token, which can be 60-120 seconds or more if it must wait for an external action such as a phone call, SMS message, etc.
- Click Save to create the server.
Visit Diagnostics > Authentication to test the RADIUS server using a valid account.
For RADIUS groups, the RADIUS server must return a list of groups in the Class RADIUS reply attribute as a string. Multiple groups must be separated by a semicolon.
For example, in FreeRADIUS, to return the admins and VPNUsers groups, the following Reply-Item RADIUS Attribute would be used:
Class := “admins;VPNUsers”
If the RADIUS server returns the group list properly fora user, and the groups exist locally, then the groups will be listed on the results when using the Diagnostics > Authentication page to test an account. If the groups do not show up, ensure they exist on DefenseBolt with matching names and that the server is returning the Class attribute as a string, not binary.
1.2) LDAP
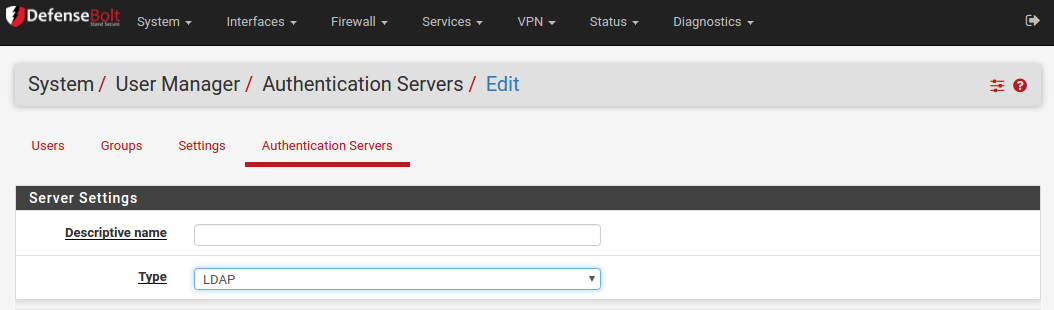
To add a new LDAP server:
- Make sure that the LDAP server can be reached by the firewall.
- If SSL will be used, import the Certificate Authority used by the LDAP server into DefenseBolt before proceeding.
See Certificate Authority Management for more information on creating or importing CAs.
- Navigate to System > User Manager, Servers tab.
- Set the Type selector to LDAP. The LDAP Server Settings will be displayed.
- Fill in the fields as described below:
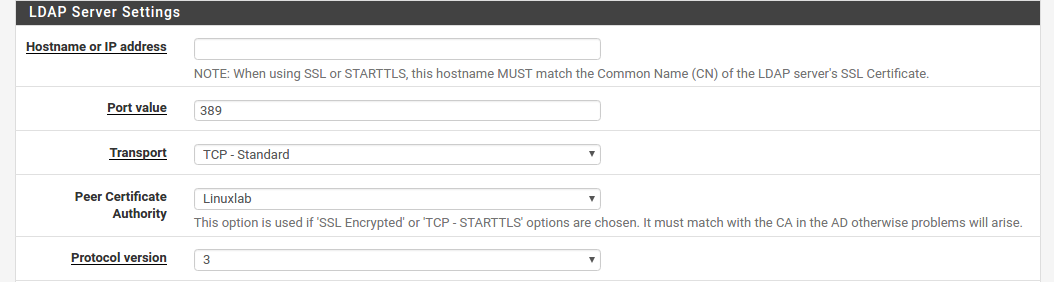
Hostname or IP address The address of the LDAP server. This can be a fully qualified domain name, an IPv4 IP address, or an IPv6 IP address.
Note
If SSL will be used, a Hostname must be specified here and the hostname must match the Common Name ofthe server certificate presented by the LDAP server and that hostname must resolve to the IP address of the LDAPserver, e.g. CN=ldap.example.com, and ldap.example.com is 192.168.1.5. The only exception to this is if the IP address of the server also happens to be the CN of its server certificate. This can be worked around in some cases by creating a DNS Forwarder host override to make the server certificate CN resolve to the correct IP address if they do not match in this network infrastructure and they cannot be easily fixed.
Port value This setting specifies the port on which the LDAP server is listening for LDAP queries. The default TCP port is 389, and 636 for SSL. This field is updated automatically with the proper default value based on the selected Transport.
Note
When using port 636 for SSL, DefenseBolt uses an ldaps:// URL, it does not support STARTTLS. Ensure that the LDAP server is listening on the correct port with the correct mode.
Transport This setting controls which transport method will be used to communicate with the LDAP server. The first, and default, selection is TCP - Standard which uses plain TCP connections on port 389. A more secure choice, if the LDAP server supports it, is SSL - Encrypted on port 636. The SSL choice will encrypt the LDAP queries made to the server, which is especially important if the LDAP server is not on a local network segment.
Note
It is always recommended to use SSL where possible, though plain TCP is easier to setup and diagnose since a packet capture would show the contents of the queries and responses.
Peer Certificate Authority If SSL - Encrypted was chosen for the Transport, then the value of this selectoris used to validate the certificate of the LDAP server. The selected CA must match the CA configured on the LDAP server, otherwise problems will arise. See Certificate Authority Management for more information on creating or importing CAs. Protocol version Chooses which version of the LDAP protocol is employed by the LDAP server, either 2 or 3, typically 3.
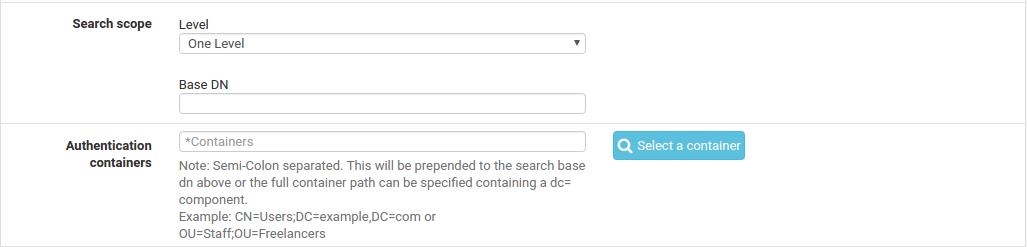
Search scope Determines where, and how deep, a search will go for a match.
Level Choose between One Level or Entire Subtree to control how deep the search will go. Entire Subtree is the best choice when the decision is not certain, and isnearly always required for Active Directory configurations.
Base DN Controls where the search will start. Typically set to the “Root” of the LDAP structure, e.g. DC=example,DC=com
Authentication containers A semicolon-separated list of potential account locations or containers. These containers will be prepended to the search Base DN above or specify a full container path here and leave the Base DN blank. If the LDAP server supports it, and the bind settings are correct, click the Select button to browse the LDAP server containers and select them there. Some examples of these containers are:
- CN=Users;DC=example;DC=com This would search for users inside of the domain component example.com, a common syntax to see for Active Directory
- CN=Users,DC=example,DC=com;OU=OtherUsers,DC=example,DC=com This would search in two different locations, the second of which is restricted to the OtherUsers organizational unit.
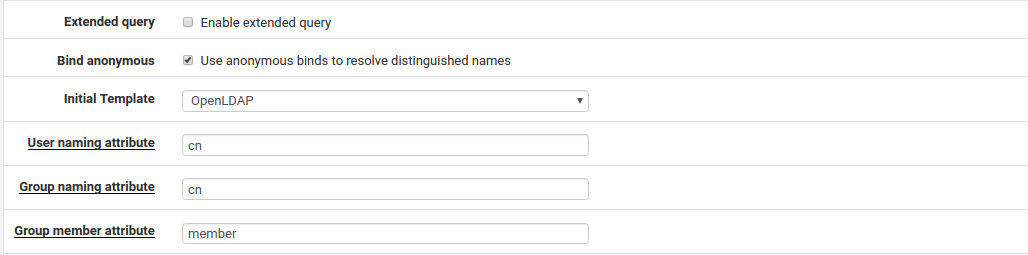
Extended Query Specifies an extra restriction to query after the username, which allows group membership to be used as a filter. To set an Extended Query, check the box and fill in the value with a filter such as:
memberOf=CN=VPNUsers,CN=Users,DC=example,DC=com
Bind credentials Controls how this LDAP client will attempt to bind to the server. By default the Use anonymous binds to resolve distinguished names box is checked to perform an anonymous bind. If the server requires authentication to bind and perform a query, uncheck that box and then specify a User DN and Password to be used for the bind.
Note
Active Directory typically requires the use of bind credentials and may need a service account or administrator equivalent depending on the server configuration. Consult Windows documentation to determine which is necessary in a specific environment.
Initial Template Pre-fills the remaining options on the page with common defaults for a given type of LDAP server. The choices include OpenLDAP , Microsoft AD , and Novell eDirectory.
User naming attribute The attribute used to identify a user’s name, most commonly cn or samAccount Name.
Group naming attribute The attribute used to identify a group, such as cn.
Group member attribute The attribute of a user that signifies it is the member of a group, such as member, memberUid, memberOf, or uniqueMember.
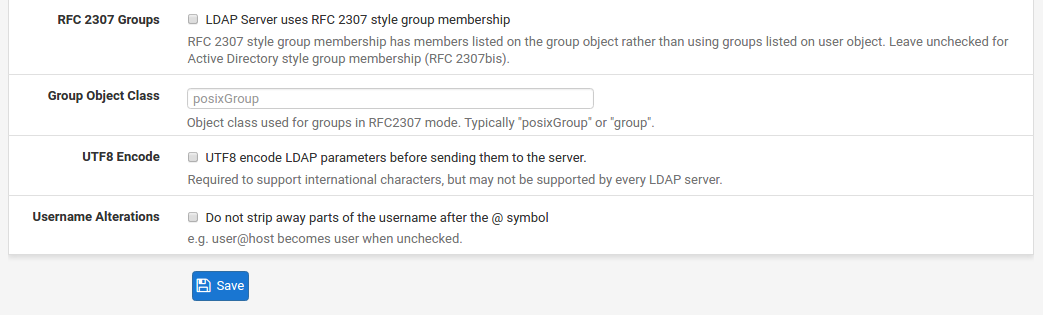
RFC2307 Groups Specifies how group membership is organized on the LDAP server. When unchecked, Active Directory style group membership is used where groups are listed as an attribute of the user object. When checked, RFC 2307 style group membership is used where the users are listed as members on the group object.
Note
When this is used, the Group member attribute may also need changed, typically it would be set to memberUid in this case, but may vary by LDAP schema.
Group Object Class Used with RFC 2307 style groups, it specifies the object class of the group, typically posixGroup but it may vary by LDAP schema. It is not needed for Active Directory style groups.
UTF8 Encode When checked, queries to the LDAP server will be UTF8-encoded and the responses will be UTF8-decoded. Support varies depending on the LDAP server. Generally only necessary if user names, groups, passwords, and other attributes contain non-traditional characters.
Username Alterations When unchecked, a username given asuser@hostname will have the @hostname portion stripped so only the username is sent in the LDAP bind request. When checked, the username is sent in full.
- Click Save to create the server.
- Visit Diagnostics > Authentication to test the LDAP server using a valid account.
If the LDAP query returns the group list properly for a user, and the groups exist locally, then the groups willbe listed on the results when using the Diagnostics > Authentication page to test an account. If the groups do not show up, ensure they exist on DefenseBolt with matching names and that the proper group structure is selected (e.g. RFC 2703 groups may need to be selected.)