L2TP
L2TP uses UDP port 1701. Because L2TP relies on UDP, the server may have issues using any WAN that is not the default gateway. The daemon will respond from the firewall using the closest address to the client, following the routing table, which is the WAN with the default gateway for remote clients.
Configuration
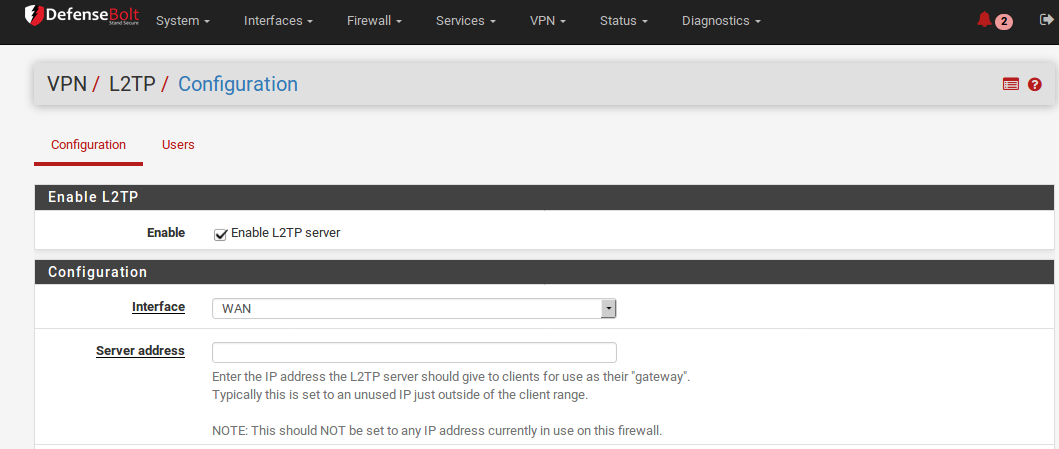
To use L2TP, first browse to VPN > L2TP. Select Enable L2TP server.
Interface
The Interface setting controls where the L2TP daemon will bind and listen for connections. This is typically the WAN interface accepting inbound connections.
IP Addressing
Before starting, determine which IP addresses to use for the L2TP server and clients and now many concurrent clients to support. Server Address An unused IP address outside of the Remote Address Range.
Remote Address Range
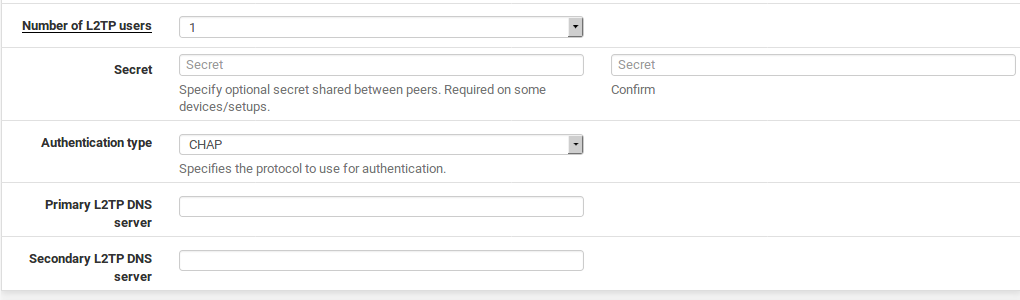
Usually a new and unused subnet. These are the addresses to be assigned to clients when they connect. Number of L2TP users Controls how many L2TP users will beallowed to connect at the same time, in this example 16 has been selected. DNS servers can also be defined for end users when needed. Fill in the Primary and Secondary L2TP DNS server fields with the DNS server IP addresses for connecting clients.
Authentication
Secret Required by some L2TP implementations, similar to a group password or pre-shared key. Support for this varies from client to client. Leave the field blank unless it is known to be required. If required, enter and confirm the secret.
Authentication Type Decides between PAP, CHAP, or MS-CHAPv2 authenticationfor users. Support for this can vary from client to client and it may also depend on the RADIUS server as well. The CHAP based types are more secure, but PAP is more widely compatible. Users may be authenticated from the local user database, or via an external RADIUS server. This can be used to authenticate L2TP users from Microsoft Active Directory (see RADIUS Authentication with Windows Server) as well as numerous other RADIUS capable servers.

If using RADIUS, check the Use a RADIUS server for authentication box and fill in the RADIUS server and shared secret. A second RADIUS server can also be added in case the first one fails. For authentication using the local user database, leave that box unchecked. Users must be added manually onthe Users tab of the VPN > L2TP screen unless using RADIUS. See Adding Users below for more details on the built-in authentication system.
Save changes to start L2TP server
After filling in the aforementioned items, click Save. This will save the configuration and launch the L2TP server.
Configure firewall rules for L2TP clients
Browse to Firewall > Rules and click the L2TP VPN tab. These rules controltraffic from L2TP clients. Until a firewall rule has been added to allow traffic, all traffic initiated from connected L2TP clients will be blocked.Traffic initiated from the LAN to L2TP clients is controlled using LAN firewall rules. Initially an allow all rule may be desired here for testing purposes as shown in Figure L2TP VPN Firewall Rule, and once functionality has been verified, restrict the ruleset as desired.
Note
Remember that a rule must also be added to the interface receiving the L2TP traffic, typically WAN or IPsec,to pass udp to the firewall eith a destition port of 1701.
Adding Users
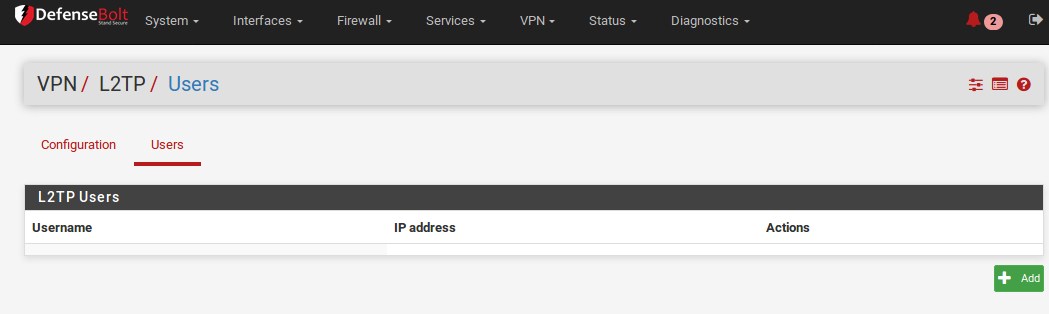
Adding users to the built-in L2TP users system is simple. To add local users: - Navigate to VPN > L2TP, Users tab.
- Click pluse buttent Add to show the form used to add users.
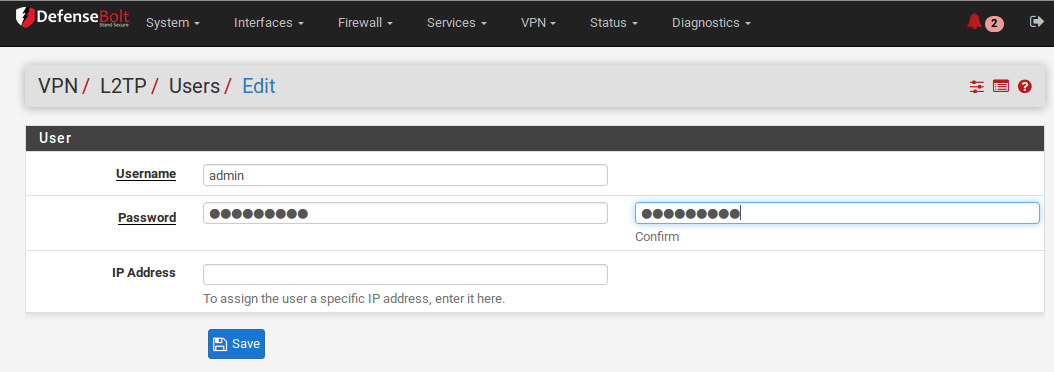
- Enter the Username, Password and Confirm Password for a user.
- Enter a static IP assignment if desired.
- Click Save, and then the user list will return.
- Repeat the process for each user to add.
L2TP with IPsec
On current versions of DefenseBolt, L2TP/IPsec may be configured for mobile clients, though it is not a configuration we recommend. As warned at the start of the chapter, the Windows client, among others, and the strongSwan IPsec daemon are not alawys compatible, leading to falure in many cases. We strongly recommend using another solution such as IKEv2 instead of L2TP/IPsec.
Setup IPsec
These settings have been tested and found to work with some clients, but other similar settings may function as well. Feel free to try other encryption algorithms, hashes, etc.
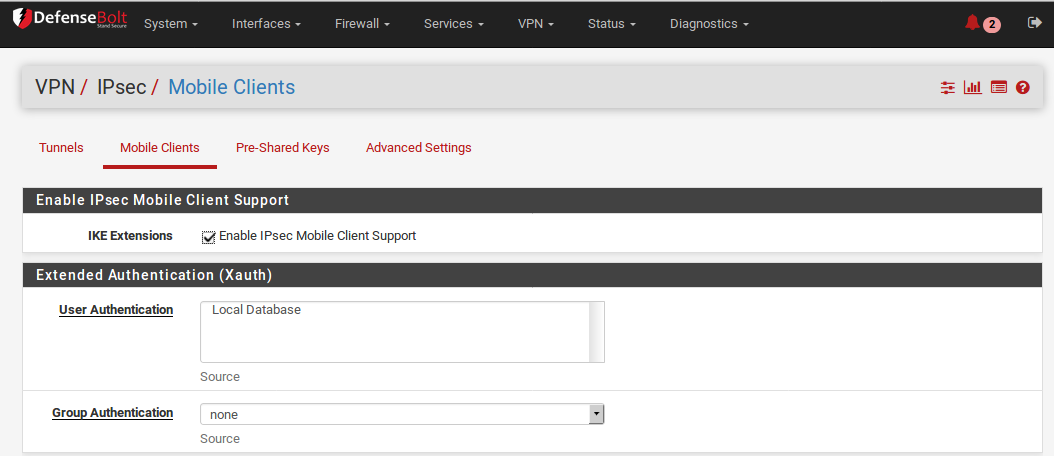
Mobile Clients Tab
- Navigate to VPN > IPsec, Mobile Clients tab on defenseBolt
- Check Enable IPsec Mobile Client Support
- Set User Authentication to Local Database (Not used, but the option must have something selected)
- Uncheck Provide a virtual IP address to clients
- Uncheck Provide a list of accessible networks to clients
- Click Save
Phase 1
- Click the Create Phase1 button at the top if it appears, or edit the existing Mobile IPsec Phase 1
If there is no Phase 1, and the Create Phase1 button does not appear, navigate back to the Mobile Clients tab and click it there.
- Set Key Exchange version to v1
- Enter an appropriate Description
- Set Authentication method to Mutual PSK
- Set Negotiation Mode to Main
- Set My Identifier to My IP address
- Set Encryption algorithm to AES 256
- Set Hash algorithm to SHA1
- Set DH key group to 14 (2048 bit)
Note
iOS and other platforms may work with a DH key group of 2 instead.
- Set Lifetime to 28800
- Uncheck Disable Rekey
- Set NAT Traversal to Auto
- Check Enable DPD, set for 10 seconds and 5 retries
- Click Save
Phase 2
- Click pluse Show Phase 2 Entries to show the Mobile IPsec Phase 2 list
- Click pluse Add P2 to add a new Phase 2 entry if one does not exist, or click to edit an existing entry
- Set Mode to Transport
- Enter an appropriate Description
- Set Protocol to ESP
- Set Encryption algorithms to ONLY AES 128
- Set Hash algorithms to ONLY SHA1
- Set PFS Key Group to off
- Set Lifetime to 3600
- Click Save
Pre-Shared Key
The Pre-Shared Key for the connection, which is common for all clients, must be configured in a special way.
- Navigate to VPN > IPsec, Pre-Shared Keys tab on DefenseBolt
- Click pluse Add to add a new PSK
- Set the Identifier to allusers
Note
The allusers name is a special keyword used by DefenseBolt to configure a wildcard PSK, which is necessary for L2TP/IPsec to function. Do not use any other Identifier for this PSK!
- Set Secret Type to PSK
- Enter a Pre-Shared Key, such as aaabbbccc – ideally one a lot longer, more random, and secure!
- Click Save
- Click Apply Changes
IPsec Firewall Rules
Firewall rules are necessary to pass traffic from the client host over IPsec to establish the L2TP tunnel, and inside L2TP to pass the actual tunneled VPN traffic to systems across the VPN. Adding the L2TP rules was covered in the previous section. To add IPsec rules:
- Navigate to Firewall > Rules, IPsec tab
- Review the current rules. If there is an “allow all” style rule, then there is no need to add another. Continue to the next task.
- Click pluse Add to add a new rule to the top of the list
- Set the Protocol to any
- Set the Source and Destination to any
Note
This does not have to pass all traffic, but must at least pass L2TP (UDP port 1701) to the WAN IP address of the firewall
- Click Save
- Click Apply Changes
DNS Configuration
If DNS servers are supplied to the clients and the Unbound DNS Resolver isused, then the subnet chosen for the L2TP clients must be added to its access list.
- Navigate to Services > DNS Resolver, Access Lists tab
- Click pluse Add to add a new access list
- Enter an Access List Name, such as VPN Users
- Set Action to Allow
- Click pluse Add Network under Networks to add a new network
- Enter the VPN client subnet into the Network box.
- Choose the proper CIDR, e.g. 25
- Click Save
- Click Apply Changes
Client Setup
When configuring clients, there are a few points to look for:
- Ensure that the client operating system configuration is set to connect to the proper external address for the VPN.
- It may be necessary to force the VPN type to L2TP/IPsec on the client if it has an automatic mode.
- The client authentication type must match what is configured on the L2TP server (e.g. CHAP)
L2TP Troubleshooting
This section covers troubleshooting steps for the most common problems users encounter with L2TP.
Cannot connect
Check that firewall rules have been added to the external interface where the L2TP traffic enters the firewall. Also make sure the client is connecting to the interface IP address chosen on the L2TP settings
Connected to L2TP but cannot pass traffic
Ensure firewall rules have been added to the L2TP VPN interface as described in Configure firewall rules for L2TP clients.
Also ensure the remote subnet across the VPN is different from the local subnet. It is not possible to reach a network across the VPN when the localsubnet where the client resides is also traffic destined for that subnet will never traverse the VPN because it is on the local network. This is why it is important to choose a relatively obscure LAN subnet when using a VPN. Connection Fails with a Windows Client
If the IPsec layer appears to complete, but no L2TP traffic passes, it is likely a known incompatibility between Windows and the strong Swan daemon used on DefenseBolt. There is currently no known workaround except to movethe Windows system out from behind NAT, or to use a different style VPN such as IKEv2.
L2TP Traffic Blocked Outbound
In some cases, such as when combined with IPsec, L2TP traffic may also require special handling via floating rules. This appears as blocked traffic in the outbound direction in the firewall logs, showing an L2TP server interface.
If this happens, add a floating rule as follows:
Navigate to Firewall > Rules, Floating tab
Click pluse Add to add a new rule to the top of the list
Set Action to Pass
Check Quick
Select L2TP VPN for the Interface
Set Direction to Out
Set Protocol to TCP
Set Source/Destination as needed, or set to any
Advanced Features:
Set TCP Flags to Any flags
Set State Type to Sloppy State
L2TP Logs
A record of login and logout events is kept on Status > System Logs, on the VPN tab, under L2TP Logins.
Each login and logout is recorded with a timestamp and username, and each login will also show the IP address
assigned to the L2TP client. The full log can be found on the L2TP Raw tab.DefenseBolt can act as an L2TP VPN server. L2TP is purely a tunneling protocol that offers no encryption of its own, so it is typically combined with some other encryption technique, such as IPsec.